I have been wanting to re-do my office for some time now, but before I do that I had to do a major clean up first! {I didn't think about taking pictures until I was almost done with the office, so sadly I can't show you how it looked before} But this way I can start from here on out. There is a lot that I would love to do to this space...
1.) Paint the room
2.) Add a shelves
3.) Get a soft rug
4.) Build a long desk perfect for me and the workspace I need
5.) Get/create more storage
6.) Get a new computer x) {what? I need a bigger screen for my Netflix}
7.) Create a "Bow Wall" for customers that drop in to see my new stuff
8.) Lighting! Lighting! Lighting!
My space is pretty little so this is all I could come up with for now. But good start I must say! So here are some photos of my space currently.
Enjoy!

{the map on the wall has pins for every place I have shipped an order to!}

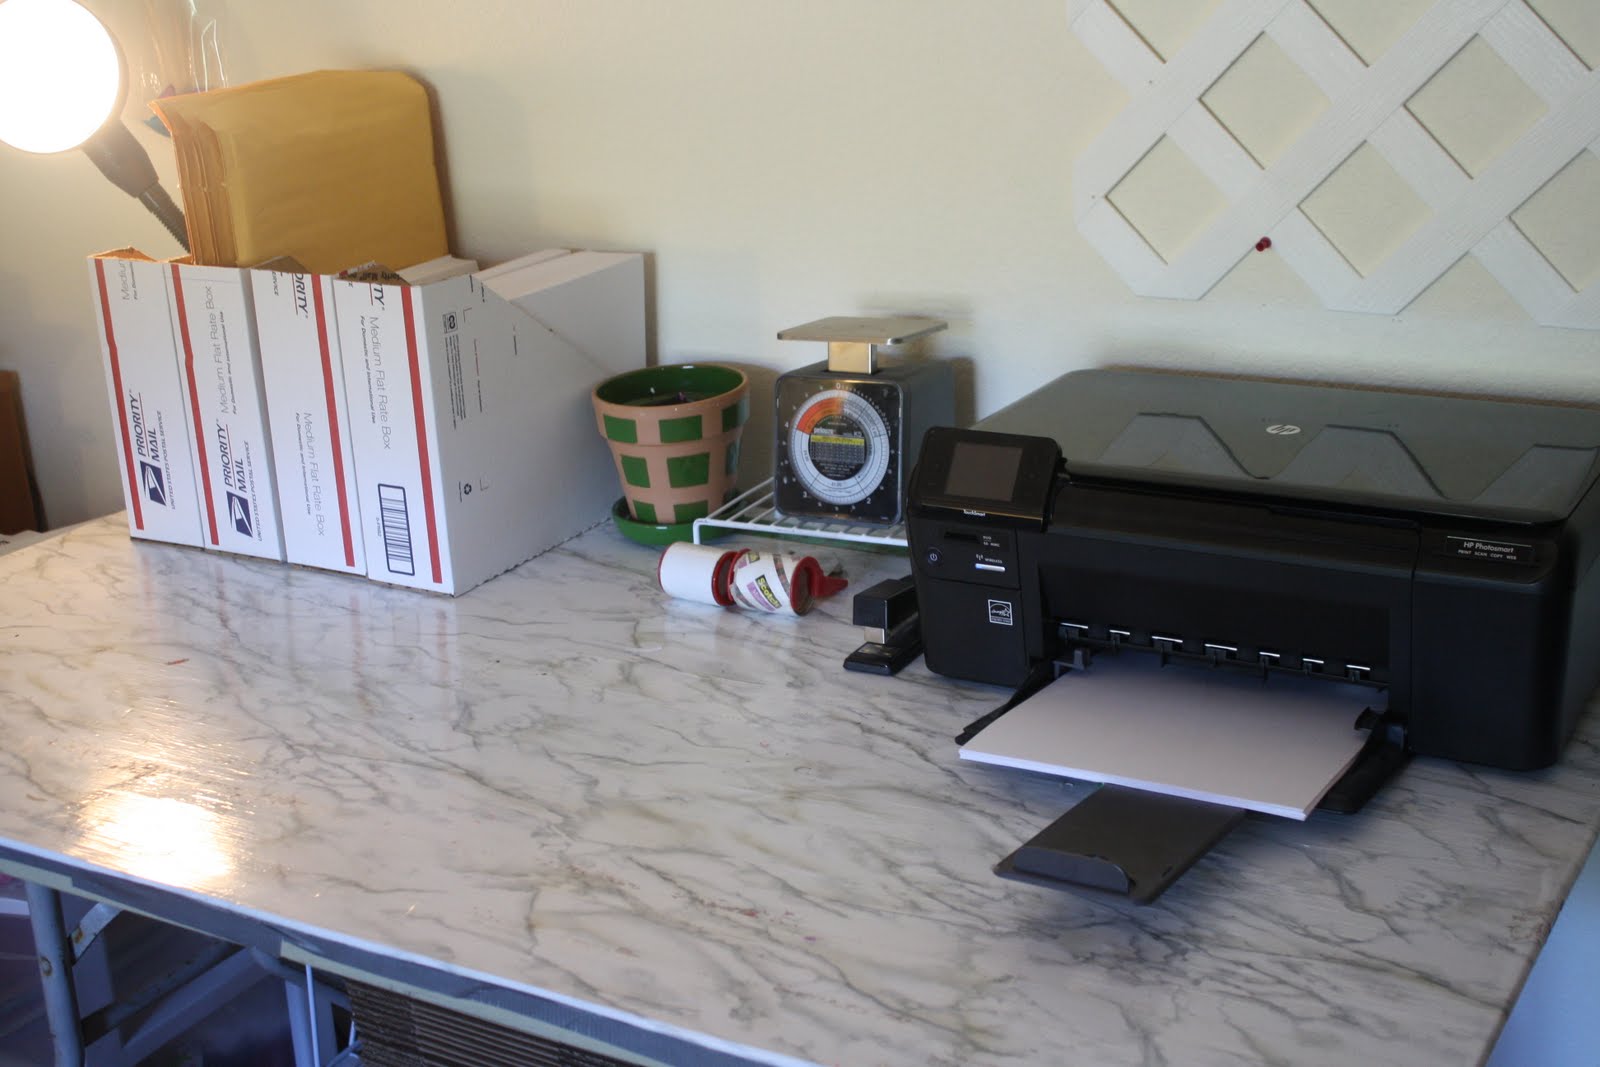
This is my "shipping/printing" area. Not my Favorite, But I do like that it's simple & organized {for now}

Under the "shipping/printing" desk, I have shipping boxes & basket's with bows ready to take to my next craft fair.

Oh! I don't know if you noticed, but i made my own magazine holders out of post office boxes to hold important things! How neat, I know! x)

I printed out labels and ran them through my sticker maker. Not sure if I'm going to jazz these up or not. I kind of think they give the area a cute shipping feel. haha, that & it makes me feel better about being too lazy to do something to these.
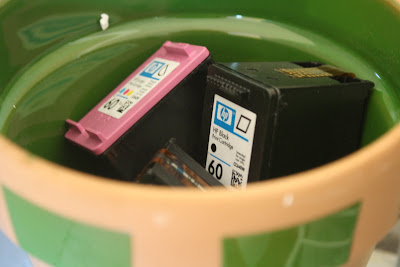
My little pot that holds all of my old printer ink. So that when I know I am going to my local Staples I can just grab these up and take them in. I use to do a lot of searching or coming home and finding one or two I forgot to take before. No more of that!

Okay so I am still working on this little area, but this desk is next to my work desk. I made some paper slots for receipts and orders. {yes those are post office boxes I made them from!}


I have little baskets that I keep all of my almost finished bows and my pieces of ribbon that need bows!

I use this rack for orders ready for pick up.

tutu's ready to go out! =)

Basket full of flops!

I really want to paint this white, but not to sure just yet. This is basically the only storage I have right now. Yeah I know..... I'm working on it.

If you don't know yet, I have a love for all things Mason Jar! I love rummaging the thrift stores in search of these! I keep my loose ribbon in these lovely jars.

This is what I call my bottle cap corner. All things bottle cap like go here.

My little Issy likes to make pretty little bracelets for her friends and to sell at my craft shows, so I made her a little corner until I can make her a little spot of her own in my office.

Under my desk I keep my scrapbook paper and scrap book paper scraps. {I hate it but again I NEED MORE STORAGE!!!}

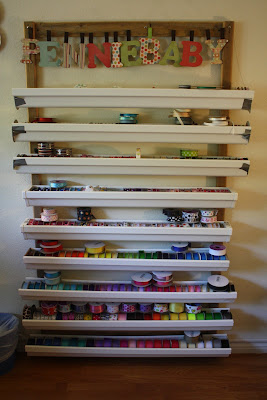
And last but not least....My ribbon holder. I'm looking into making a bigger area on my wall because this is just not cuttin' it!
So that's it as of today. I know it's a little blah, but I'm not really going for anything spectacular right now. I just want to be organized. Then little by little work on making my space GLORIOUS!
P.S. I just made a HUGE chalk board out of a piece of wood. It will be going on a big blank spot on my wall. I just haven't figured out what I want to use it for yet!
I wanted to show you another idea I had for the magazine holders, since this is sitting right out side of the door from my office. My brother and sister get some of their mail here, & we are always looking through huge piles of mail. So I decided to simplify this part of our life, and I have to say it's working great! It takes me 2 seconds to look at mail and put it in a mail bin!


1.) Paint the room
2.) Add a shelves
3.) Get a soft rug
4.) Build a long desk perfect for me and the workspace I need
5.) Get/create more storage
6.) Get a new computer x) {what? I need a bigger screen for my Netflix}
7.) Create a "Bow Wall" for customers that drop in to see my new stuff
8.) Lighting! Lighting! Lighting!
My space is pretty little so this is all I could come up with for now. But good start I must say! So here are some photos of my space currently.
Enjoy!

{the map on the wall has pins for every place I have shipped an order to!}
This is my "shipping/printing" area. Not my Favorite, But I do like that it's simple & organized {for now}

Under the "shipping/printing" desk, I have shipping boxes & basket's with bows ready to take to my next craft fair.

Oh! I don't know if you noticed, but i made my own magazine holders out of post office boxes to hold important things! How neat, I know! x)

I printed out labels and ran them through my sticker maker. Not sure if I'm going to jazz these up or not. I kind of think they give the area a cute shipping feel. haha, that & it makes me feel better about being too lazy to do something to these.

My little pot that holds all of my old printer ink. So that when I know I am going to my local Staples I can just grab these up and take them in. I use to do a lot of searching or coming home and finding one or two I forgot to take before. No more of that!

Okay so I am still working on this little area, but this desk is next to my work desk. I made some paper slots for receipts and orders. {yes those are post office boxes I made them from!}


I have little baskets that I keep all of my almost finished bows and my pieces of ribbon that need bows!

I use this rack for orders ready for pick up.

tutu's ready to go out! =)

Basket full of flops!

I really want to paint this white, but not to sure just yet. This is basically the only storage I have right now. Yeah I know..... I'm working on it.

If you don't know yet, I have a love for all things Mason Jar! I love rummaging the thrift stores in search of these! I keep my loose ribbon in these lovely jars.

This is what I call my bottle cap corner. All things bottle cap like go here.

My little Issy likes to make pretty little bracelets for her friends and to sell at my craft shows, so I made her a little corner until I can make her a little spot of her own in my office.

Under my desk I keep my scrapbook paper and scrap book paper scraps. {I hate it but again I NEED MORE STORAGE!!!}


And last but not least....My ribbon holder. I'm looking into making a bigger area on my wall because this is just not cuttin' it!
So that's it as of today. I know it's a little blah, but I'm not really going for anything spectacular right now. I just want to be organized. Then little by little work on making my space GLORIOUS!
P.S. I just made a HUGE chalk board out of a piece of wood. It will be going on a big blank spot on my wall. I just haven't figured out what I want to use it for yet!
I wanted to show you another idea I had for the magazine holders, since this is sitting right out side of the door from my office. My brother and sister get some of their mail here, & we are always looking through huge piles of mail. So I decided to simplify this part of our life, and I have to say it's working great! It takes me 2 seconds to look at mail and put it in a mail bin!